How to Grow a Perennial Garden

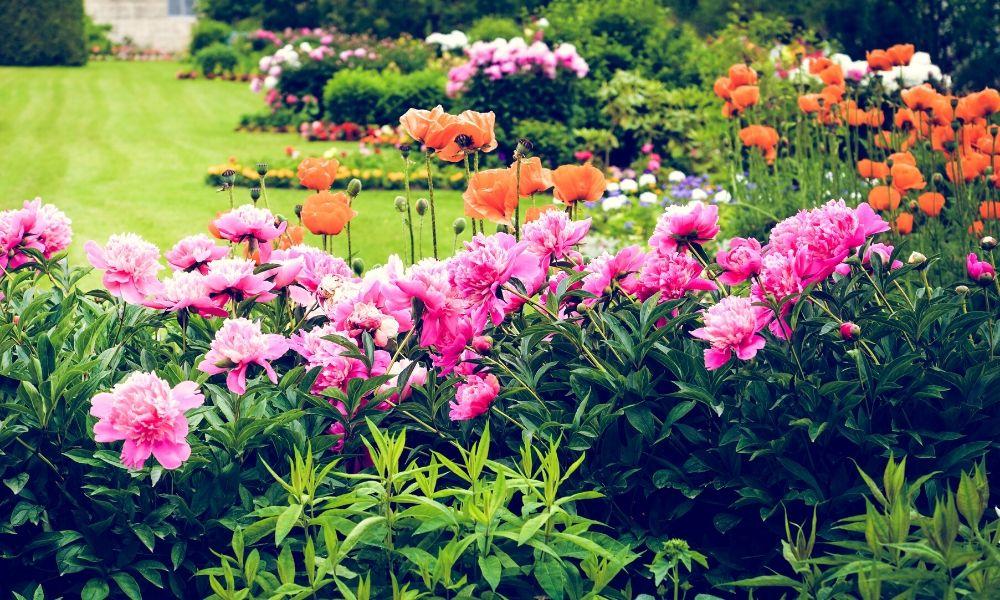
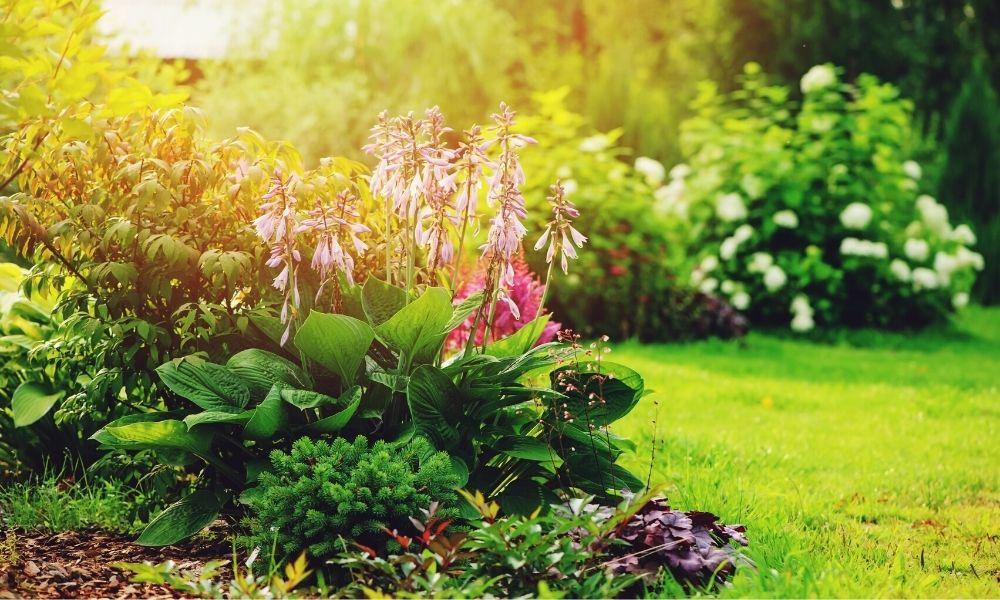
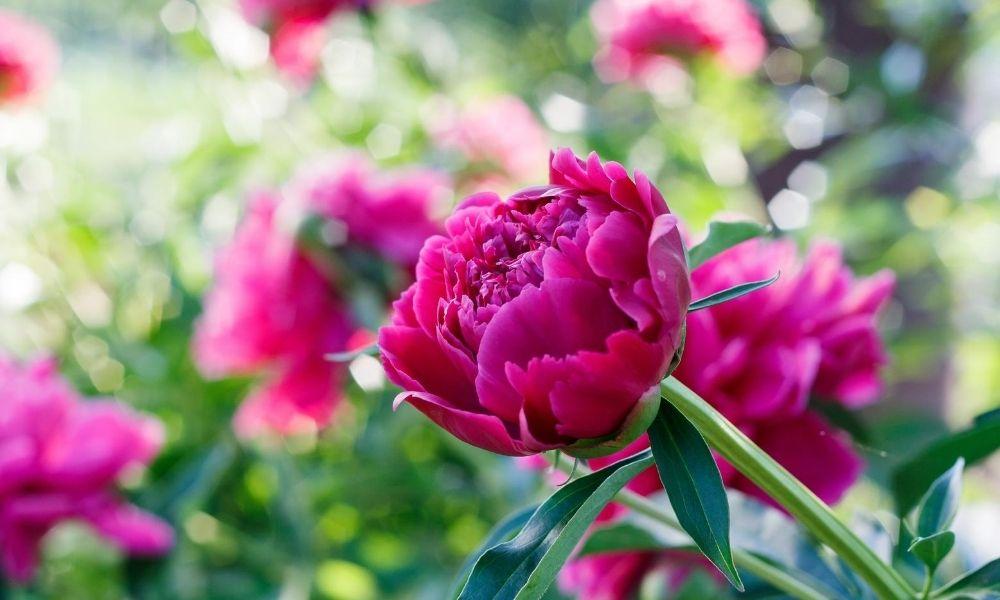
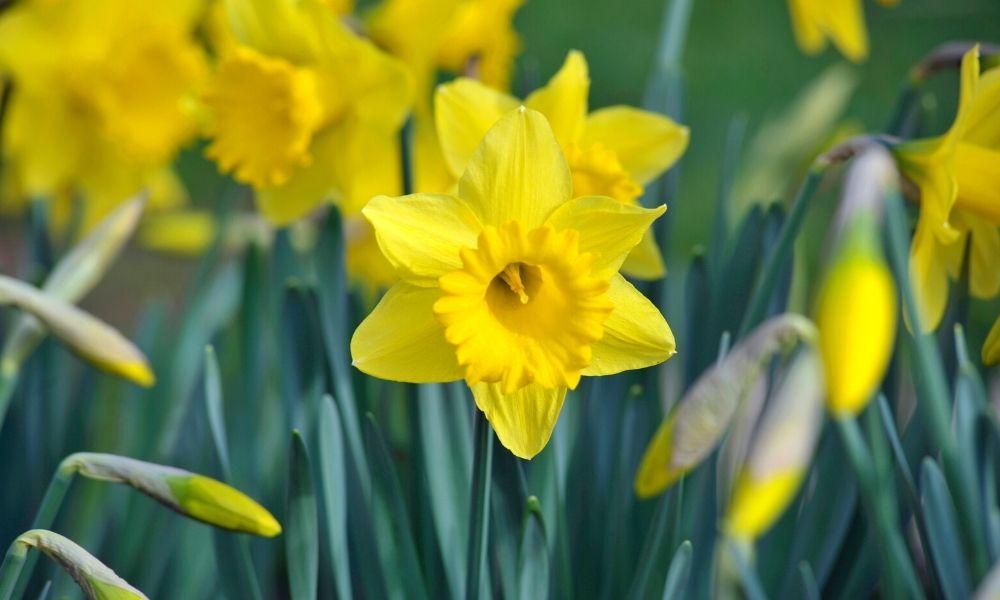
Planting perennials is the perfect way to build a long-lasting, low-maintenance garden that will bring you color and interest throughout the year. Perennials come in an array of beautiful colors, heights, and blooming times, including varieties such as salvia, coneflowers, lavender, and many more. If you’re looking for some fun additions to your home garden, or if you’re planning on starting your first one, then it’s time to learn how to grow a perennial garden.

BUILD THE RIGHT BED

The first thing you need to do is measure your future garden area. Decide where you want to put your plants, then buy flowers accordingly. You don’t want to underbuy or overbuy, so by taking the right measurements, you can find the right perennials for your home. It’s always fun to add new plants each year as you find new varieties that you fall in love with. As a gardener, you will have a never-ending wish list of plants that you want to add into your garden.

FIND THE PERFECT PERENNIALS

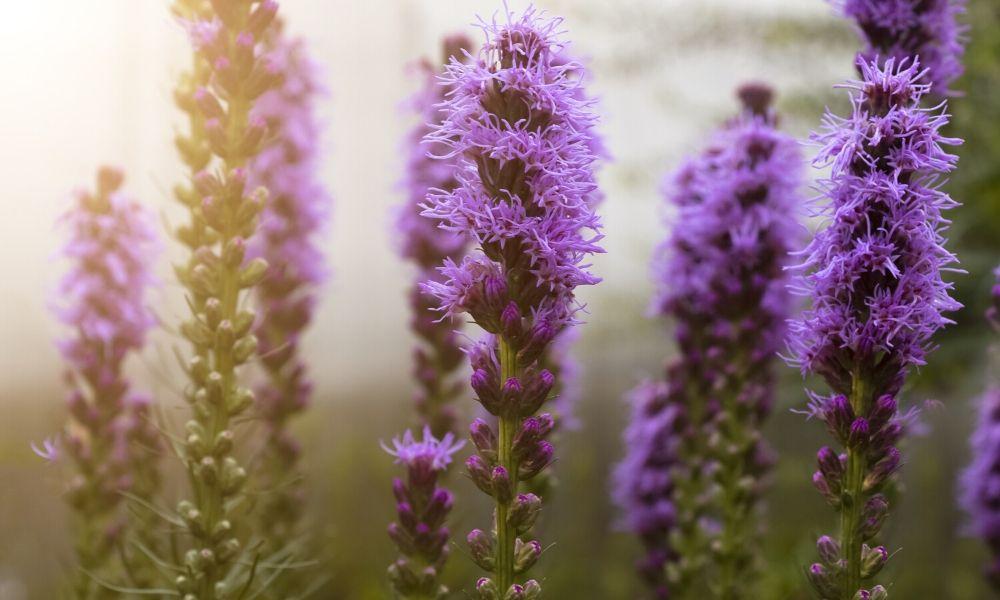
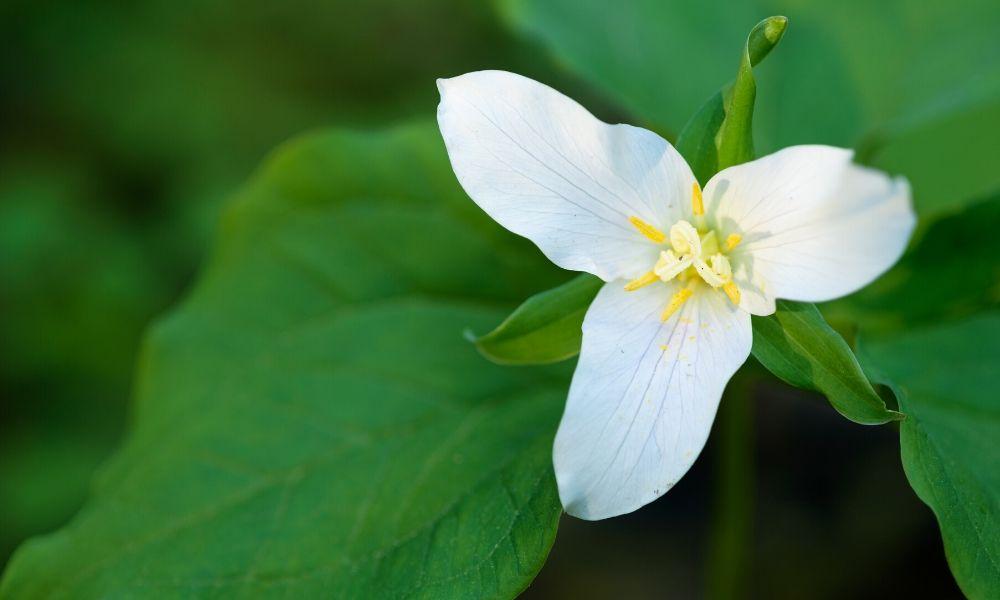
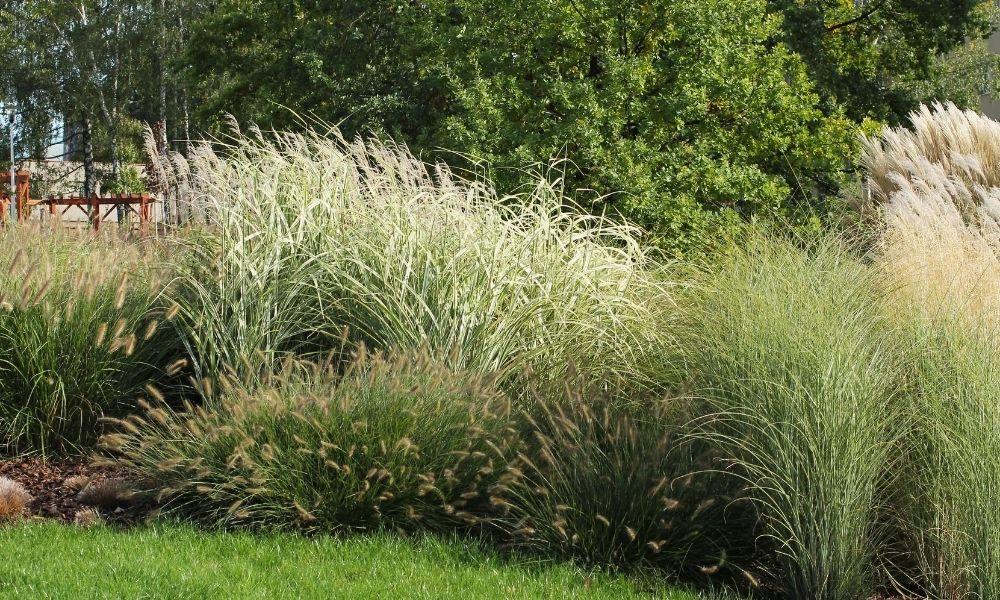
There are two very important steps when choosing your perennials—selecting the right plants for your climate and finding the right time to plant them. Different perennials come with different requirements, such as how much sun they require, what soil type do they like, and how much water do they need. For instance, some need hours of sunlight, while perennial shade plants and flowers don’t require quite as much sun. Choosing plants with different blooming times will ensure you have a garden that will have some blooms from early spring to late summer. You can also plant non-blooming plants such as grasses, vines, small evergreen shrubs for added texture and color. Reading up on the eclectic variety of perennials available to your growing zone will ensure you have success with perennials.

SOIL-ER ALERT

The soil you choose for your garden is important to the performance of your newly planted perennials. While soil may not come to mind as being the most important aspect of gardening, it certainly is on the top of the list. It will play a major factor in the success or failure of a garden. To ensure a spectacular garden with plants that are healthy and vibrant, it is often necessary to incorporate soil amendments such as compost, peat moss, or other organic materials. This will help improve nutrient content and moisture retention in your soil. Building good soil is paramount to growing a great garden.

PLANTING PERENNIALS

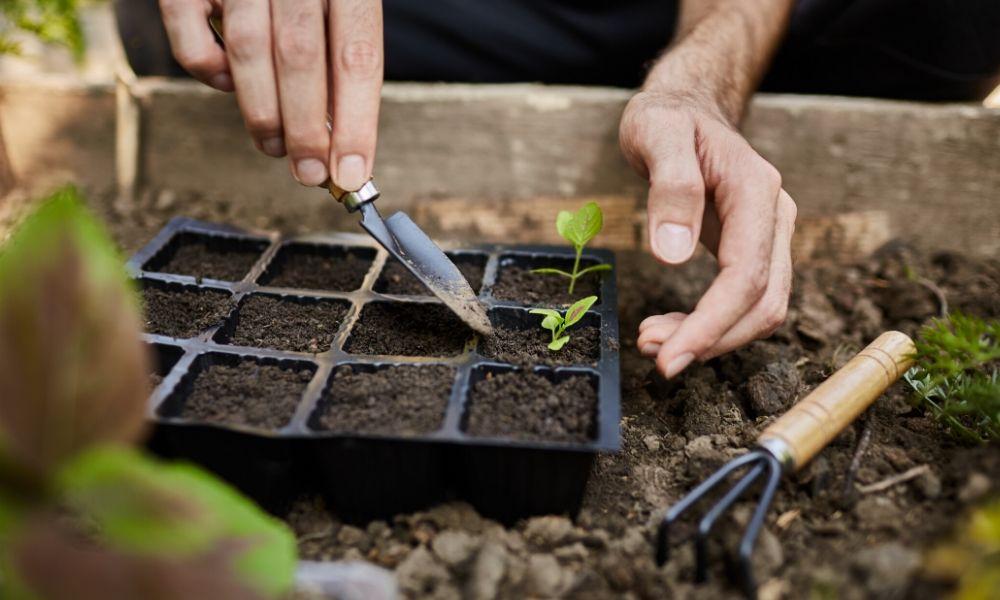
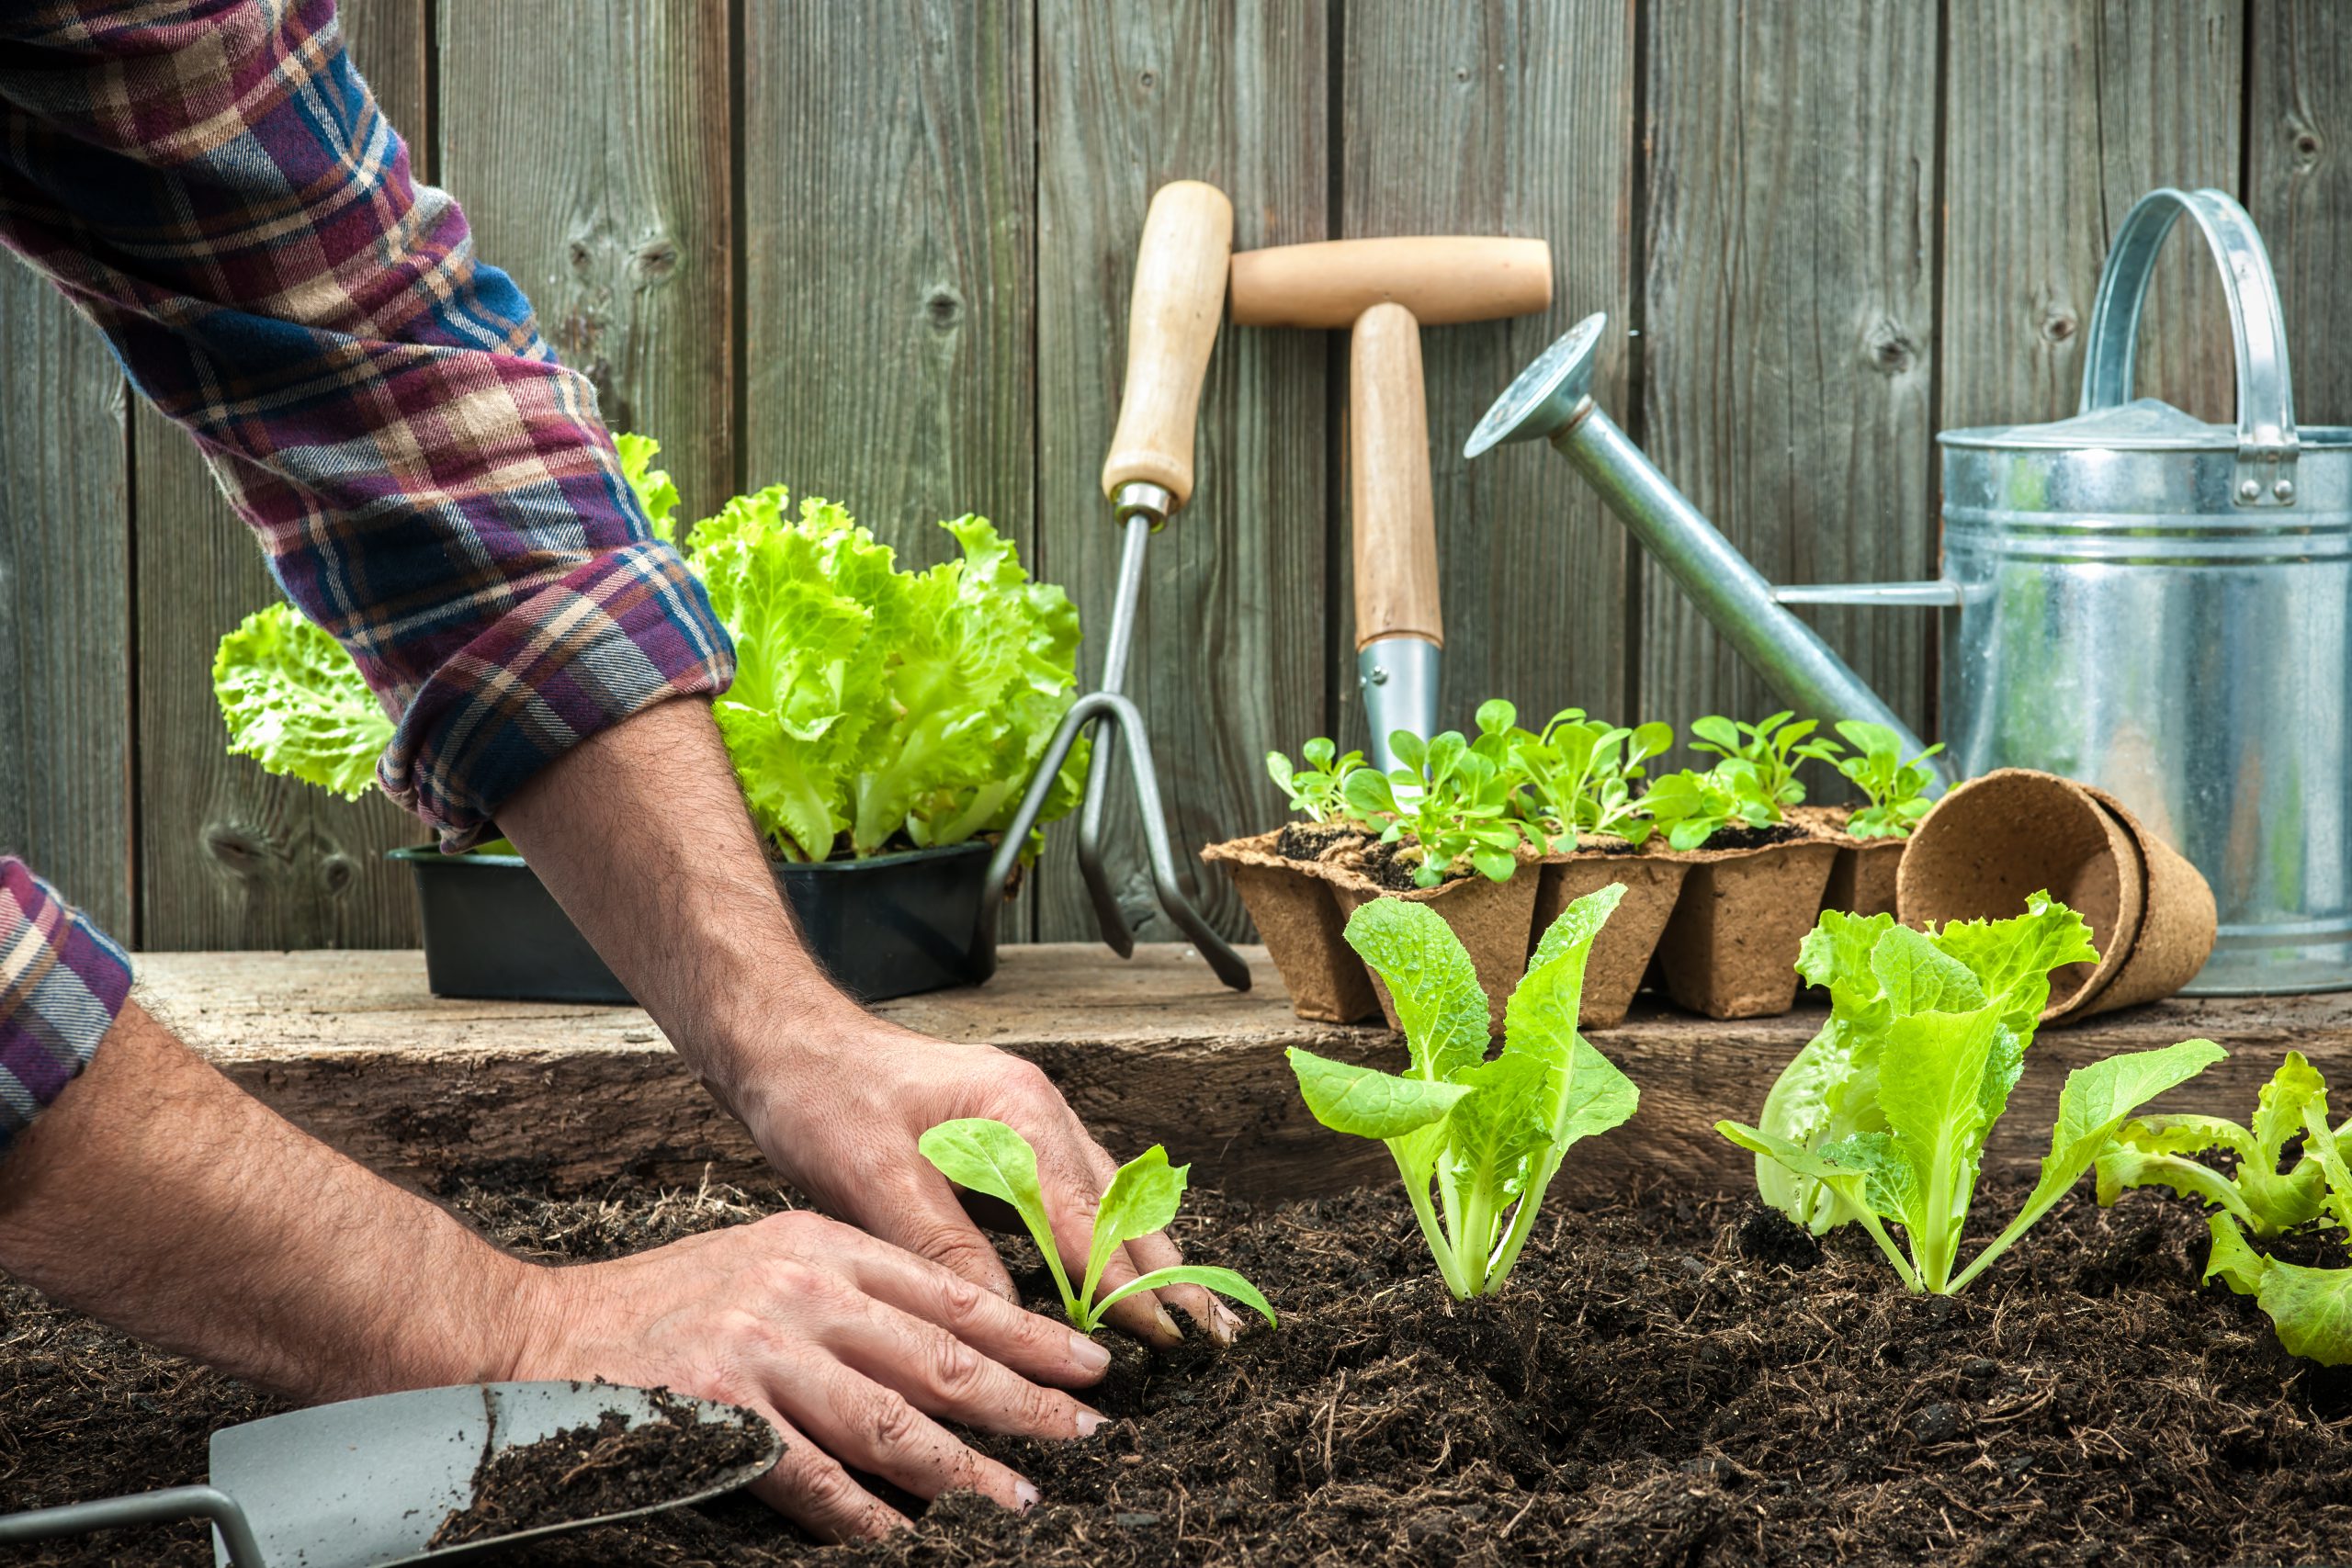
Before planting, you’ll want to water the perennial to make sure the roots aren’t too brittle when planting. When you plant your perennials into your garden, it’s important to make sure the depth at which they sit in the soil is the same depth at which they sit in the pot. Make sure the width of the hole you’re placing the flowers into is slightly larger than the pot itself. Doing this will make sure the roots truly flourish as they grow.

MAINTAINING PERENNIALS

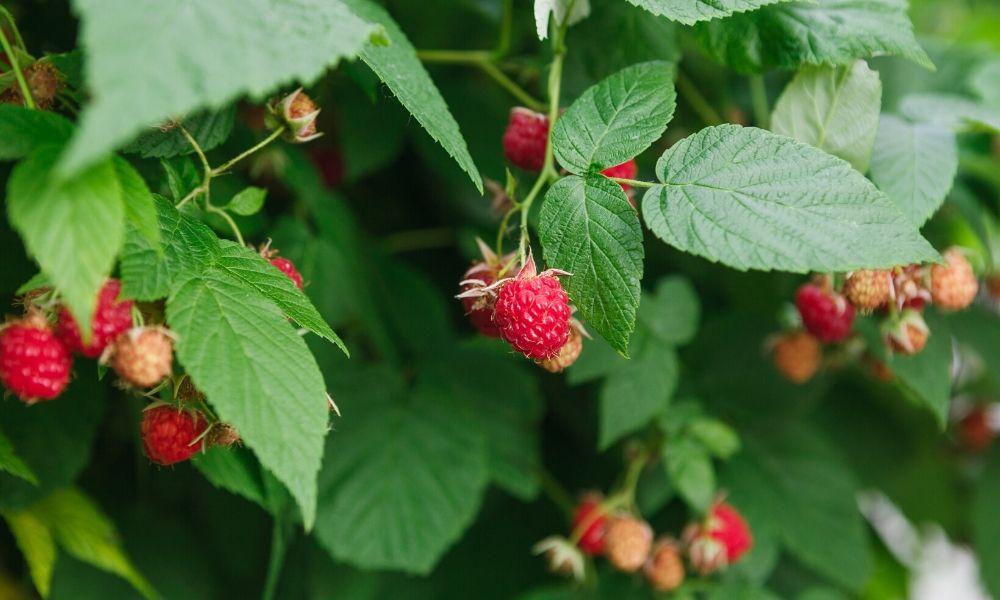
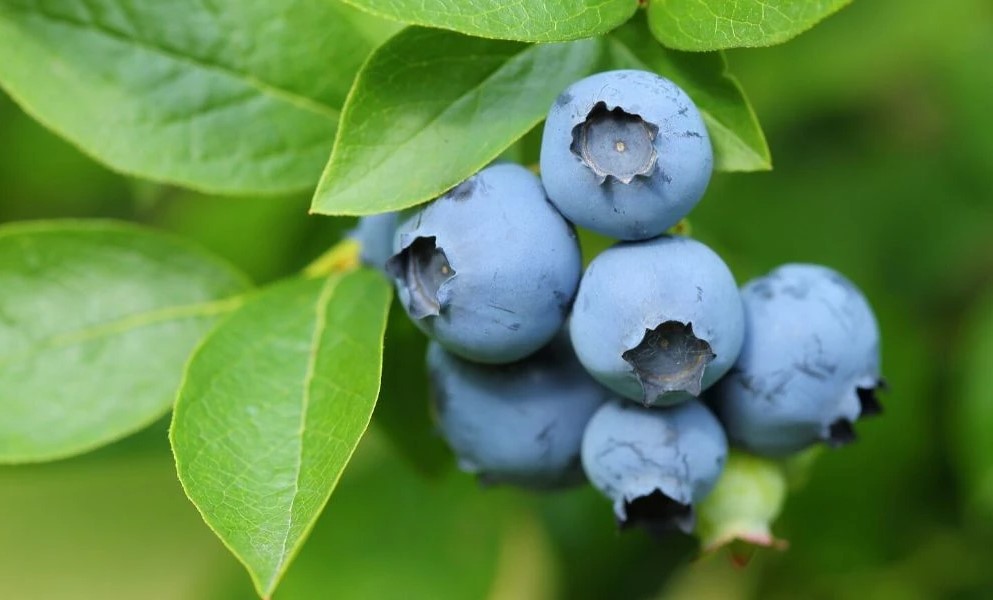
Perennials should be watered once a week for the first few weeks while they establish their root system. In fact, you should water them right after they’ve been planted. When it comes to fertilization, choose a granular fertilizer that you mix into the top of your soil when you are preparing or renovating your existing bed. If applying a water-soluble fertilizer, you can do this starting one week after transplanting. Remember to hold any fertilizer after mid-summer on your perennials and berry bushes. Fertilizing too late in the season can cause a lot of growth that is not ready for winter. Remember to mulch your newly planted garden to help retain moisture and prevent weeds from growing.

Learning how to grow perennials is very easy. Once you’ve done it and experimented with the various types of perennials, you’ll be an expert in no time. These plants, which can thrive for many years, are the perfect way to spruce up your home garden.

Read more

How to Choose a Raspberry Plant

When you’re adding new plants to your garden, you have to think about what you’re looking for. Maybe you’d like to plant something just to add some color to your garden, or maybe you want something that can produce food for you to harvest. If you want the best of both worlds, the search can be trickier. Luckily, there’s a plant out there that marries those two principles perfectly: raspberries. Learn how to choose a raspberry plant for your garden so that you can produce and harvest this delicious, eye-popping fruit right in your own backyard. 

CONSIDER THE COLOR

Raspberries are known for their candy red color. However, not all raspberries are red. This delicious fruit can come in black, yellow, or even purple; each variety differs in a few ways. For instance, red raspberries are usually larger in size, while black and purple raspberries tend to be smaller. The color of the raspberry also tells how you’ll need to plant them. For instance, red and yellow raspberries grow by spreading runners in your garden. Runners are stems that, when spread across your garden, will produce suckers. These suckers are vertical shoots that become the root cuttings from which your raspberries will grow. Black and purple raspberries, on the other hand, will grow from plants that grow with side shoots. Upon growth, black and purple raspberry plants will remain a single plant.

CONSIDER THE SEASON

As with anything in your garden, you have to plant it during the right season. Summer-bearing crops will produce berries at the beginning of summer, specifically during May and June. If you want to harvest berries a bit later in the year, you can plant fall-bearing crops that will produce berries during the late summer or fall seasons. 

CONSIDER THE CLIMATE

Different varieties of raspberry plants thrive better in specific climates. For instance, Autumn Bliss plants thrive better in hotter climates, while Heritage plants are better for colder climates. Finding the right berry for your climate is integral to ensuring a good growth rate and lifespan. 

Now that you’ve learned how to choose a raspberry plant, you can add a colorful, flavorful new plant to your garden. If you know how to properly plant, grow, and harvest raspberries, you can provide yourself and your loved ones with natural, delicious food without ever having to visit the grocery store. Visit the Gentleman’s Backyard Garden to find and buy raspberry plants best-suited for your garden.

Read more

The Best Edible Plants for Summer

The world of gardening is home to an immense variety of plant types that come in a variety of colors and boast various unique attributes. There’s no end to the fun combinations of flowers, fruits, and shrubs you can grow in your yard. One side of gardening that is very fun and popular is edible plants. There are so many foods that people buy at the grocery store that are easy to grow right from the comfort of their very own backyards, as long as they have the right knowledge and materials on their side.

If you’re looking to add some tasty plants to your garden, take a look at this guide to some of the best edible plants for summer. With summer approaching so rapidly, now is a good time to start planning your summer gardening accordingly.

LEMONGRASS

If you like adding a little zest to your diet—and your garden—lemongrass is the way to go. Lemongrass is an ornamental edible plant that sprouts up and stands out in your garden, gracefully presenting itself to all passerby in your neighborhood. This delicious plant can be a great ingredient to use in various soups, baked goods, and delicious teas. Lemongrass is particularly common in tea due to the fresh lemon taste it provides, hence its memorable moniker.

It’s important to know that lemongrass can be toxic to some household pets, such as cats and dogs. Be sure you know whether your pet can safely interact with lemongrass before you buy it for your home garden. Lemongrass is a tropical plant, which means that if you add it to your garden in the hot summer months, it should be able to thrive and provide delicious ingredients for your next soup or tea. When planting lemongrass, make sure you use fertile, well-drained soil.

MINT

What’s fun about mint, aside from its unique appearance, is that you can choose from a variety of mint plants to flavor any meals or drinks you whip up at home. For instance, you can grow mojito mint for when you want to add some sweetness to a refreshing summer drink. Mint is a perennial plant that is best grown in the late summertime. Different forms of mint require different amounts of sun throughout the growing process. While some mint plants will thrive in direct sunlight, others require partial shade to grow.

Because mint is a perennial plant, it will die off and regrow each season as long as you maintain it well. For your mint to thrive, you’ll need to grow it in soil that is light and moist but well-drained, too. Additionally, you won’t have to worry about pet safety when it comes to mint. The only form of mint you’ll have to watch out for is pennyroyal, which is a form of mint that is toxic not only to dogs but to humans as well. Suffice it to say, pennyroyal isn’t the type of mint you want to put into your mojito anytime soon.

POTATOES

Potatoes are a deliciously diverse ingredient to add to your garden. This iconic veggie can be a great addition to a wide variety of meals, as Samwise Gamgee is so known for celebrating in the Lord of the Rings. Potatoes can make great side dishes, such as baked potatoes or mashed potatoes. Plus, you can even use them as a tasty ingredient in a soup or salad. Potatoes require direct sunlight to grow and come in various colors for you to choose from. Don’t worry; all potatoes tend to be very easy to plant and maintain.

You can go with the average brown-skinned potato, or you can shop for ones with gold, purple, or red skins to really make your garden pop. To begin planting your potatoes, you’ll need to use seed potatoes. Planting your seed potatoes, from which your potato will be grown, requires soil that is fertile and well-drained throughout the season, similar to lemongrass. This will ensure that your potatoes arrive with a rich, colorful outer layer and delicious, moist flesh underneath.

STRAWBERRIES

This beloved fruit can be grown during the summer; however, you will have to plant it a few months before the season. It’s a good rule of thumb to plant strawberries before the summer heat arrives, so sometime in March or April is your best bet. To prepare the soil for your strawberries, use organic matter during the planting process. Adding organic material, such as compost or manure, will make the soil moist, fertile, and slightly acidic, all of which are essential for growing strawberries.

While some types of strawberries feature a bright red exterior, others have less intense red skin. No matter what color they have, these strawberries will make a great addition to a salad or dessert. Strawberries are so flavorful on their own that you can add a few of them to your morning breakfast if you crave some extra potassium in your diet.

BLUEBERRIES

Just like strawberries, blueberries are a flavorful fruit that make the perfect addition to any smoothie or yogurt. Whether you’re making breakfast, dessert, or a quick snack, blueberries are always a great choice. While some blueberries grow better during the fall, most will thrive better in the spring or summertime. When it comes to soil conditions, the most important aspect is acidity. Blueberries need acidic soil to thrive; otherwise, they won’t grow properly.

Now that you’re more familiar with some of the best edible plants for summer, you’re ready to add some or all of them to your garden. This eclectic group of fruits and vegetables is sure to transform any garden into a place of incredible taste, in more ways than one. At The Gentleman’s Backyard, you can buy edible plants online and alter your garden to become more than just a beautiful group of flowers to look at. Not only do we have different varieties of the plants mentioned above, but we have a bevy of other edible plants as well, such as asparagus, raspberries, and haskap.

Read more

Tips for Preparing Your Garden for Summer

Which plants you can grow in your home garden depends greatly on the season you’re doing your planting. As the summertime approaches, it’s a good time to start preparing your garden for this new season of planting. If you need a refresher on how to get your garden ready, take a look at these tips for preparing your garden for the summer growing season. By paying special attention to these tips, you’ll have a better understanding of how your garden needs to be primed and ready for the summer weather.

ENRICH YOUR SOIL

One of the first steps you’ll have to take is getting your soil ready. Test your soil to see how rich in nutrients it is, something that can be done very easily with the help of a soil test kit. Using a soil test kit will determine whether your garden lacks the required nutrients for growing the plants you want. Some of the most important nutrients that your soil must supply your plants with are calcium, magnesium, nitrogen, phosphorus, potassium, and sulfur.

Next, you’ll need to gather the materials you need to enhance your soil and begin composting. The process of composting is the best way to get the necessary nutrients into your soil. It’s recommended that you start your own compost pile at home, but if you haven’t, you can purchase bags of compost from professionals.

Lay Down Mulch

Mulch, specifically organic mulch, is something you’ll see mentioned in this list multiple times because it has a bevy of benefits. As mentioned above, it’s a great organic material for improving and protecting your soil to make sure your plants flourish. Layered on top of your garden soil up to the base of your plants, mulch can increase water retention in the soil. By doing this, the mulch can successfully combat winter injury in any vulnerable plants.

This organic material is even a great deterrent for weeds as well, which can be a particularly pesky issue during the warm summer months. Additionally, pulling weeds by hands, as long as you get the root, is a time-honored method that is very effective and requires only a handheld weeding tool and some elbow grease. Herbicides are also an effective way to deal with these unwanted garden intruders.

Apply Fertilizer

Using fertilizer is a targeted method of supplying your soil with the energy and nutrients it needs to make sure your plants thrive. Many different types of fertilizer, from organic to inorganic, supply various nutrients, so make sure to find the right kind for the plants you plan to grow in your garden. At the end of the day, the most important nutrient you want the fertilizer to supply is nitrogen.

Nitrogen is widely considered to be the number one most important nutrient you need to supply to your garden for it thrive. It’s a main component of chlorophyll, which plants use in the process of photosynthesis as they convert sunshine into energy. Adding nitrogen and other fertilizers correctly will help ensure your home garden will have rich, nutritious soil for your plants to grow in.

CHOOSE THE RIGHT PLANTS

When choosing the right plants for your garden, you have to know which ones can survive in your climate. Additionally, you’ll have to figure out which ones are best to plant in your climate during which season. Cool-season vegetables can be planted in summer for fall harvest, as can flowers that bloom in the fall, such as mums, pansies, and dahlias.

It may seem backward to new gardeners, but once you practice this annually, you’ll see why it’s so important to get a head start on planting fall-blooming greenery during summer. Lush peonies, beautiful in single and double varieties, are a great example of plants that should be planted during the fall so they can properly survive during the winter and bloom the following late spring. Gentleman’s Backyard Garden has a plethora of gorgeous peony flowers for sale that you can use to beautify your home garden setup.

Another key part of choosing the right plants is knowing how much shade they require. Some flowers, such as coreopsis, require between six to eight hours of full sun to grow, whereas others require full shade to grow. However, many plants require partial shade. This means that the plant requires sun for only a few hours and should be under shade for the rest of the day. That’s why, when buying flowers, you have to buy types that can work in your garden. For example, If you don’t have any means of providing shade in your garden, then you probably shouldn’t buy a plant that needs shade, such as a fern. If you want to create shade, however, you can do so by planting full-sun plants that can bloom large enough to create shade for other plants.

GET A HEAD START ON PLANT SUPPORTS

Plant support structures like peony rings or trellises keep your plants upright and intact when they’ve gone through immense growth. Although these devices technically don’t need to be installed until the plants reach certain heights, you can place them in the right spot to guide the plant’s growth very early on in the growing season. Not only will a trellis look great with the right garden, but gardeners will also find it a fulfilling experience to see those plants slowly fill out the trellis over the course of the summer season.

Now that you’re all caught up on the topic of summer gardening, you’re ready to get out there and break ground on your brand-new home garden. These helpful tips for preparing your garden for summer will help your greenery grow strong and healthy during the duration of the season. Good preparation teamed with forward thinking are the key elements you need to properly plant a garden during any given month. By understanding which plants need to be planted each season and why, you can effectively maintain an abundant home garden all year round.

Read more

Tips for Growing Peony Flowers

Peonies are beautiful perennials that can live as long as a century under the right conditions. If you’re planning on introducing peonies into your garden for the first time, you should know a few things beforehand. These tips for growing peony flowers will play a vital role in your peonies’ ability to thrive for a very, very long time.

DON’T GET TOO DEEP

When planting peonies in your garden, make sure not to plant them too deeply in your soil. Only about one or two centimeters of soil should cover the upper roots. The reason for this is to accommodate for one of the two root types associated with peonies, which are underground stems. If you plant the peonies too deep in your soil, they won’t flower properly.

BATTLING BOTRYTIS

A common fungal disease—botrytis—can infect your peonies. This infection can rot peony roots and blacken the leaves and buds. In many cases, botrytis can lead to buds failing to bloom. The disease can be a side effect of peonies growing in unusually cool, rainy weather conditions.

That’s why it’s important to grow peonies with plenty of sun, good air circulation, and well-drained soil. If botrytis occurs in your garden, remove any infected plants from the soil and dispose of them as soon as possible.

A LITTLE HELP FOR YOUR STEMS

When peonies begin to bloom, those large flowers can be a bit too much for their long, thin stems to handle. To provide these plants with structural support when they begin growing in size, invest in some peony rings. You can install these rings directly into your soil—as the peonies grow, the rings will provide them with direction and support. That way, your flowers can thrive without the risk of drooping down onto your soil.

These tips for growing peony flowers are things you should always keep in mind if you’re introducing this plant into your garden. As with any new plant, there may be bit a bit of a learning curve, depending on what you’re used to planting. Luckily, peonies are typically easy to plant, and they shouldn’t be too much trouble for even novice gardeners. If you want to order plants online in Canada, The Gentlemen’s Backyard can provide you with a wide array of peonies and other long-lasting perennials to add to your garden when the right season comes around.

Read more

How to Select Perennials for Your Yard

Perennial plants come in a variety of designs and colors, all of which experience growth, death, and rebirth during its annual lifecycle. These easy-to-grow plants are wonderful additions to any yard, but there’s a key thing to remember: you need to know how to select perennials for your yard. Before you go and buy the first perennial you see with a pretty name or color pattern, you need to know how which plants your garden is compatible with.

ARE YOUR PLANTS SHADY?

When it comes to sunlight, perennials can be split into two categories: those that thrive in the sun and those that thrive in the shade. Finding the right perennials for your yard begins by looking at the shade or lack thereof. You may want to plant a perennial that grows in the shade, but if you don’t have enough of it in your yard, you’ll have to opt for a different perennial—such as salvia—that thrives without sun. You can also choose to restructure your garden to provide more shade for the perennial.

BLOOMING IN UNISON

One factor that applies to any and all gardens is that you should structure the garden by blooming times. That way, your plants can all bloom together. It’s not necessary for your plants’ survival; it’s simply a way to keep your garden beautiful and organized. Perennials look particularly nice blooming alongside vegetables, shrubs, and trees.

HOW’S YOUR SOIL?

Next, you’ll have to look at the soil conditions in your garden. Matching the right soil to the right perennial is another key part of its survival. For example, some perennial plants such as urn orchids require well-drained, moist soil conditions to grow. On the other hand, other perennials such as coreopsis prefer sandy soils.

CLIMATE IS KEY

Just like your soil condition, the climate conditions your perennials will endure are important to their ability to thrive. Perennial plants such as echinacea are best suited for hot climate conditions. However, if you need a perennial to survive in a cold climate, plants such as achillea are best outfitted for such environments.

Now that you know how to select perennials for your yard, you can add them to your garden in a way that will ensure their survival. Perennials will thrive under the right conditions, and they’ll also add a unique look to your home garden. If you live in Canada and want to add these plants to your yard, we can help you out. The Gentleman’s Backyard delivers perennial plants in Canada, and we have a wide array to choose from, including—but not limited to—all the perennials mentioned above.

Read more

The Best Shade-Loving Perennial Flowers

Two of the most important factors you have to consider when buying plants is how much shade it requires and whether you can provide that shade. There are two forms of shade that flowers receive: full shade and partial shade. Partial shade means that the flower receives some direct sunlight during the day, typically for only three to four hours. Full shade means the flower receives no more than an hour of direct sunlight, though receiving filtered sunlight throughout the day is usually fine.

If you want to spruce up your shady garden with some perennials, we can help you find the right flower for the job. These are the best shade-loving perennial flowers that you can add to your garden with ease.

ASTILBE

Astilbe is a common perennial that will burn with too much sun. However, with the right amount of shade and a supply of moist, well-drained soil, astilbes can transform those dark spots of your garden into something more visually appealing. They do this with the help of their bold, green foliage and eye-popping, colorful flowers. Astilbes bloom in the summertime and can come in a few different colors, such as red, pink, and white.

HELLEBORE

This perennial produces large, evergreen leaves and cup-like flowers that typically bloom during the late winter or early spring seasons depending on your local climate conditions and which type of hellebore you choose to plant. This flower, which is commonly called a rose despite not actually being a rose, prefers a cool, shady climate to thrive in. Hellebores also require well-drained soil packed with organic matter to properly grow.

TRILLIUM

This perennial thrives in partial shade and moist, well-drained soil, resulting in a lovely three-pedal bloom in early spring. Trillium’s green foliage pairs beautifully with a variety of flower colors, from deep red to snowy white. After blooming in the springtime, trillium will flower and eventually go dormant by midsummer. You can spot when the plant is dormant by the foliage color, which will turn yellow after producing seeds and nearing dormancy. Planting trillium in soil that’s rich in organic matter minimizes the necessity for watering. You’ll still have to water them during dry weather, but trillium tends to be a low-maintenance flower.

By adding some of the best shade-loving perennial flowers to areas in your garden that lack color, you can bring them life in a vibrant, natural way. At The Gentlemen’s Backyard, we have a wide range of shade-loving perennial plants for you to choose from, including variations of the plants mentioned above.

Read more

The Best Perennial Shrubs for Your Garden

Beginners in the world of gardening might only think about flowers, but there’s more to the subject than that. The diversity of plant life you can add to your garden is immense, from vines to trees to shrubs. If you’re interested in improving your yard with a burst of incredible foliage, use this guide to introduce yourself to some of the best perennial shrubs for your garden.

HYDRANGEA

Hydrangea is a perennial that sports dark foliage with beautiful bunches of flowers on the ends. It’s best to plant hydrangeas during the fall. This will allow them to fully bloom during the summertime. It may sound like a long time in advance to plant, but the purpose of this is to let the root system establish itself. At Gentlemen’s Backyard, we offer several forms of hydrangea shrubs, including Invincible Ruby, Double Delights, Wedding Gown, Lavalamp Flare, and Lavalamp Moonrock. Both Lavalamp Flare and Invincible Ruby bloom with petals that showcase a mixture of white and pink, while Lavalamp Moonrock and Wedding Gown have creamy white petals upon blooming.

The colors and designs differ, but what these and other hydrangeas have in common is that they’re easy to maintain and deer-resistant. They also attract both butterflies and bees and require either partial or full sun throughout the day. Additionally, during the growing period, you’ll only need to provide them with about an inch of water each week. Here’s a quick tip—water hydrangeas in the morning on particularly hot summer days. Hydrangeas can handle full sun, but this will help them remain strong and healthy in the face of extreme heat.

SALIX FLAMINGO

This beautiful willow is broad-leafed and fast-growing. It sports long, red stems from which foliage grows in a vibrant mixture of green, white, and pink. When it comes to watering, keep this in mind: the drier the climate, the more frequently the salix flamingo needs water. It also requires soil that’s always moist yet well-drained. Because this shrub loves moisture so much, providing it with a healthy layer of mulch will help it retain moisture so that it can properly thrive in your garden.

Similar to hydrangeas, the salix flamingo can handle either partial shade or full sun. However, giving it full sun will produce the richest foliage color. This shrub is also similar to hydrangeas in the way that it attracts bees and butterflies, though it’s deer-resistant as well.

From their brilliant colors to their low-maintenance requirements, these are the best perennial shrubs for your garden. If you’re interested in obtaining these perennial shrubs, then visit our online garden store, which will also introduce you to a wide selection of perennial vines and other beautiful plant life for your yard.

Read more

Ways to Use Ornamental Grasses in Your Garden

Planting a flower garden and adding flowerpots around the property are both unique ways to enhance the look and atmosphere of your humble abode. Even though their vibrant petals look spectacular, sometimes just having flowers isn’t enough to get that desired look or effect you were hoping for.

That’s where foliage like ornamental grasses come into play. When you first think of planting a garden, grass is probably not the first thing that comes to mind. Our list below will show you some of the most creative ways to use ornamental grasses in your garden. After reading through these uses, you should have a better understanding of why these long, thin bunches of grass are so beneficial to your home garden.

CREATE A NATURAL FENCE

Instead of investing in a wooden fence, you can create a natural fence with the help of tall ornamental grasses. Not only does having a wall of large perennial grasses look beautiful, but it will also help enhance privacy in your yard. On the other hand, maybe you have a mundane view of something from your yard, like an empty lot or a busy street, that you’d like to patch up with something prettier.

PROVIDE EYE-CATCHING GROUND COVER

While some ornamental grasses can grow tall enough to provide suitable privacy, others are small and dense enough to create the perfect ground cover. The two best types of ornamental grasses to use for this are dense low-growing grasses and mid-size grasses. If you’re using large ornamental grasses for ground cover, you might be overthinking it just a bit. Using these grasses for ground cover will help suppress weeds in the garden while also providing it with a unique appearance that will wow neighbors and house guests alike.

ADD A UNIQUE TEXTURE TO YOUR GARDEN

As delightful as those bright flowers you might already have in your garden are, sometimes your garden can still lack that special something that makes it yours. With the help of large or mid-size ornamental grasses, you can add a bit more variety in the way of height and texture. These grasses can come in various colors, which provides you with the opportunity to really get creative and mix-and-match different grasses to make your garden stand out as the focal point of your yard.

UPGRADE YOUR WATER GARDEN

Speaking of unique, the word certainly applies to water gardens. One of the best ways to make your water garden stand out even more is with the help of ornamental grasses. That being said, this doesn’t go for all ornamental grasses, so be sure the one you buy can properly thrive in aquatic environments. For suitable grasses, place them in a pot before putting them in the water. Submerge a majority of the ornamental grass except for the crown. With the proper handling and care, ornamental grasses pair delightfully with colorful flowers in a water garden.

COMPLIMENT YOUR GARDEN ART

Ornamental grass is also an incredible way to enhance any garden art you have. The light, wavy blades will provide a unique texture to the area’s surrounding sculptures, spinners, pottery, fountains, and any other installments you might have on the property. If you want that garden art to be the focal point of your yard, ornamental grasses will help you achieve just that.

ATTRACT NEARBY WILDLIFE

If you love hearing birds chirp in the morning and seeing them flying around in your yard, ornamental grasses are for you. Ornamental grasses are an attraction for birds due to the seeds which birds use for food. Additionally, the long blades of ornamental grass make a great tool for creating bird nests, so you’ll certainly see them taking advantage of that. However, birds are not the only wildlife ornamental grasses will attract. Butterflies will also fly through your garden because these grasses make great host plants which butterflies rely on to plant their eggs.

RECOMMENDED ORNAMENTAL GRASSES

As you can see, there is a wide range of ways to use ornamental grasses in your garden. If you’re in need of a garden store in Canada to find the perfect ornamental grasses for your yard, we’re here to help. At The Gentlemen’s Backyard, we have an eclectic variety of ornamental grasses that include three types of Miscanthus Sinensis, two types of Hakonechloa, two types of Panicum virgatum, and unique Schizachyrium s. ‘Blue Paradise’.

If you want to enhance the texture of your yard with an ornamental grass that can withstand hot, dry conditions— ‘Blue Paradise’ will pull it off in spades. This is thanks to the variety’s silver/blue stems that develop in the summer and develop even more unique colors in the fall thanks to their wine-purple leaves and tan seed heads. ‘Blue Paradise’ is a single plant that can provide your garden with a wide range of diverse colors.

The Hakonechloa Grass ‘Aureola’, with its yellow blades that sport green stripes streaming down their center, is the perfect plant for draping over garden art. The reason for this is because of the unique ways its blades flow. Instead of the blades sticking out in all different directions like a foliage explosion (like our ‘All Gold’ Hokenchloa Grass), they all flow in the same direction, more akin to a waterfall or a babbling brook.

If you’re looking to create a natural fence or garden focal point, that’s where Miscanthus Sinensis comes in handy. These tall perennials showcase thin stems and large, bountiful plumes on the end. Miscanthus Sinensis typically features creamy tan flowers on bold, green grass. However, each type of Miscanthus Sinensis has its own unique color changes depending on the season.

For instance, the grass Miscanthus Sinensis ‘Huron Sunrise’ showcases burgundy flowers in the summertime, whereas the grass Miscanthus Sinensis ‘Huron Star’ will instead carry those creamy tan flowers. Although, when fall comes around, the foliage of the ‘Huron Star’ will feature unique shades of burgundy, gold, orange, and red. If purple plumes are more your taste, then look towards the grass Miscanthus Sinensis ‘Encore’, which will take on that shade of color during the latter part of the year, right before the winter frost arrives.

Another way to create a natural fence or enhance any ponds in your yard is with the help of Panicum virgatum. The grass Panicum virgatum ‘Apache Rose’ is a dense, dark bunch of green-grey leaves that take on a hint of red on their tips when fall comes around. If you want a bit more color variety, then the grass Panicum virgatum ‘Cheyenne Sky’ will do the trick.

This ornamental grass will first wow you with its blue-green foliage, but when the summertime arrives, that blue-green turns into deep wine-red. Later in the summer, the flower panicles of ‘Cheyenne Sky’ will begin turning into that same wine-red shade to match the foliage. Whichever time of year it is, ‘Cheyenne Sky’ will make an exotic addition to any garden.

Read more

Perennials To Cut Back in the Fall

As winter approaches, you’ll need to cut back some of the perennials in your garden. Removing any drying foliage will help these plants stay intact during the season so that they can rebloom down the line. However, not all of your perennials need pruning at the same time. This guide to which perennials to cut back in the fall will help you understand which plants to prune when the time arrives.

ACHILLEA (YARROW)

This perennial offers a unique texture that draws the eye of anyone admiring your garden. However, to prevent disease, make sure to prune your achillea plants back to the basal leaves in the fall.

NEPETA (CATMINT)

You can cut back your nepetas in one of two ways: by cutting back the plant by half or cutting it down to a few inches above the ground. Either works, but the former will allow the plants to return sooner.

PEONY

Peonies are lush additions to any garden, but over time, they can accumulate some powdery mildew. Suffice it to say, mildew isn’t very pretty. To prevent that from happening, cut back peonies to the ground when the plant begins to darken to a shade of yellow, gold, or brown.

PHLOX

This plant provides your garden with some truly unique petal designs, but just like peonies, your phlox plants can be prone to powdery mildew. To avoid this disease, cut them down to a couple of inches above the ground in the fall.

SALVIA

This plant is a great choice for gardeners who want a vibrant way of attracting wildlife such as hummingbirds, bees, and butterflies. To keep your woody salvia healthy enough to rebloom the following year, cut it back to about a few inches above the ground, just like the nepeta.

Knowing which perennials to cut back in the fall will help you effectively maintain their life cycles for years. If you don’t take the steps to properly prune these plants, they’ll not only become eyesores, but also begin housing nasty diseases that you don’t want anywhere near your garden. At the Gentlemen’s Backyard, we can help you design your garden with a wide variety of plant life, such as succulents and highbush blueberry plants. Whichever type of plant you add to your garden, make sure you know the pruning protocols prior to the purchase.

Read more

How to Plant, Grow, and Care for Lily Flowers

Lilies are perennials that bloom beautifully in a variety of vibrant colors. In order to get that result, you need to take proper care of these plants as they grow in your yard. To help you get the right results from your lilies, we’ve put together this guide on how to plant, grow, and care for lily flowers at home.

PLANTING

Gardeners can plant lilies during the spring, but the best time to begin planting them is in the fall. You shouldn’t plant just one, either. For a truly stunning display, plant your lilies in clusters of three. However many you plant, it’s essential that you know for sure when you’re going to plant your lily bulbs after buying them. The longer you hang onto the bulbs after the initial purchase, the more moisture they’ll lose. If you’re planting lilies in the spring, don’t buy the bulbs in the fall to prepare ahead of time.

Another potential issue that can affect your lilies is a lack of sunlight. Plant your lilies in an area where they’ll receive full sun—though partial shade is typically fine as well. As long as the plants get at least six hours of sun per day, you should be in the clear.

When you do get your lily bulbs, the soil in which you’re planting them must be well-drained. Good drainage will allow your lilies to thrive and bloom successfully instead of quickly developing root rot. When you’re planting the lily bulbs, mix in some organic matter to enhance your soil drainage. Take note of the pH levels in your yard’s soil as well. Lilies thrive in acidic soil, but be wary of how high your pH levels are. You should aim for soil that ranges from 5.5 to 6.5 in terms of pH with these perennials.

When it comes time to loosen up the soil so that you can add the lily bulbs, take the time to loosen up 12 to 15 inches of it. This depth will provide the bulbs with protection from extreme temperatures while allowing their roots to successfully develop. Next, dig four- to nine-inch-deep holes for each bulb you’re planting. To choose the right depth, take your climate conditions into consideration. If you live in an area with a warm climate, you should plant the lily bulbs nine inches deep to keep them cool and healthy. Although lilies like heat up top, the roots down below need shade and cool temperatures to thrive.

Provide about eight to 12 inches of space between each bulb, though spacing varies depending on the bulb size. Avoid planting them too close, because lilies need good air circulation in order to grow. When you place the bulbs in the soil, the roots should be facing downward and the tip should be facing upward. Once your bulbs are in their new homes, you can cover them up with soil, pat the soil gently, and then provide them with their first servings of water.

GROWING AND CARING

Don’t be shy about watering your lilies; you want to provide your plants with a healthy helping of H2O. While your lilies are moving through the active growth phase, provide them with about one inch of water each week. When spring arrives, your lilies will begin emerging from the soil. At this point, to keep the soil moist and nutritious, add a couple inches of mulch around the lilies, and then mix in some fertilizer as well. That way, you can maintain a healthy environment in which your lilies can thrive.

As your lilies grow in the spring, another factor to keep an eye out for is their height. If your lilies are tall, use stakes to keep them upright as they begin to blossom. If you keep them happy and healthy during active growth, then by the time summer rolls around, you’ll finally be able to see those perennials bloom.

The leaves on your lilies play a key role in forming new bulbs for the following year’s blooms. This means you should avoid removing any foliage from the lilies until the end of fall, when the foliage has begun turning yellow or brown. However, removing the stems and flowers is a different story. You can carefully remove these after the lilies have bloomed for any number of reasons. You can cut down stems and use the lilies as part of a bouquet. On the other hand, removing fading or wilting flowers can prevent the plant from unnecessarily using energy to form seed pods for that particular flower.

If you’re cutting the flowers, leave at least two-thirds of the stem behind. Although the plant can lose part of the stem, it does need the rest of it for the same reason it needs the leaves: to facilitate the growth of more bulbs for the following season.

Once your lilies bloom in the summer, the flowers usually stick around for a few weeks. You can either leave them be so that they provide a form of natural beauty in your yard, or you can cut them to put in vases or bouquets. If you do decide to put lilies in a vase, remove the leaves on the lower end of the stem beforehand so that they don’t sit underwater.

The best time to cut lilies is during the earliest stages of the bud’s opening, either right before it opens or right after. To avoid stains from the orange pollen in the lilies, carefully remove the stamen that rests inside the flower.

Now that you know the ins and outs of how to plant, grow, and care for lily flowers, you’re ready to seek out bulbs of your own. At the Gentlemen’s Backyard, we have a wide variety of lily bulbs for sale, some of which form flowers that sport dark purple and bright white color combinations. Others will feature a more uniformly pink or peach design. Whichever lilies you choose, as long as they receive the right care, they’ll provide your garden with stunning, vibrant flowers when summer arrives each year.

Read more

How to Identify and Treat Common Plant Diseases

There are many diseases that can strike your garden for a bevy of reasons. This guide will show you how to identify and treat common plant diseases so you can maintain a healthy garden all year round.

GRAY MOLD

If flowers or produce in your garden develop gray or brown mushy spots, it’s a sign of gray mold (AKA botrytis). This disease typically starts with a wilting, wounded, or dying plant before spreading. Over time, those gray spots begin housing gray spores that can move easily to other plants with the help of the wind. The rate of growth for these spores can increase if humidity levels are high in your area.

To combat gray mold, prune the infected parts of plants and safely dispose of them. After this, apply a fungicide to prevent the disease from spreading to the rest of the plant. However, it’s important to be mindful of your clean-up process. First, disinfect the equipment after you finish pruning. Secondly, make sure to clean up any debris that fell into the soil during the pruning and removal process. If you don’t, this can promote the further growth of gray mold in your garden.

ANTHRACNOSE

This fungal disease typically attacks trees, shrubs, and some fruit. Most of the time, you’ll notice it on leaves or twigs. This is important to keep an eye out for because it’s there that anthracnose can overwinter. You’ll know it’s anthracnose if you find leaves or twigs with brown or black lesions, particularly along leaf veins. It might sound like a small cosmetic issue, but if untreated, anthracnose can quickly wilt and rot your tree leaves and other foliage.

Similar to dealing with gray mold, you’ll need to prune and dispose of any infected foliage. Afterward, make sure there aren’t any infected plants left in your yard. Once you’re sure about that, disinfect your tools. Finally, use a fungicide to help keep remaining twigs and leaves healthy. These fungicides won’t eradicate the disease from foliage that has already been infected, but it can keep it from spreading to other healthy plants in the garden. To prevent the disease from returning, try improving the air circulation around plants, and avoid overwatering leaves.

RUST

Rust is a common fungal disease among plants such as hollyhocks and roses. It’s a very easy disease to spot because, as the name suggests, it causes an effect that makes the plant look like rusted metal. This orange-brownish discoloration comes with noticeable bumps along the surface of leaves and stems. However, it can sometimes begin as a whitish color before darkening.

Treating this disease is similar to the previous two diseases. First, remove and dispose of the infected foliage. Afterward, make sure to get rid of any fallen debris and begin applying a fungicide to prevent its return. If signs of rust continue to appear, go through the removal process again until the disease stops coming back.

Now that you know how to identify and treat common plant diseases such as rust, gray mold, and anthracnose, you’ll be ready to attack the moment they appear. If you’re looking for some new greenery to replace old or infected ones, we can help you out. At The Gentlemen’s Backyard, we can provide your garden with plant life like hardy grass plants to give your yard a uniquely beautiful appearance.

Read more

How to Care for Highbush Blueberry Plants

Highbush blueberry plants provide crops of beautiful, delicious fruit. However, making sure this perennial plant is ready to blossom takes a lot of time and effort. If you’re up to the challenge, you should be aware of a few important guidelines. These tips will help you understand how to care for highbush blueberry plants to produce a thriving, bountiful crop.

WATERING

Just like the rest of the plants in your garden, highbush blueberry plants require a healthy amount of water throughout the week. However, the plants require a different amount of water depending on what stage they’re in. For instance, during the growing season, provide highbush blueberry plants with one inch of water each week. However, during the time in which the plants are ripening, provide them with four inches of water each week.

MULCHING

Blueberry plants have shallow root systems. Because of this, you’ll need to provide them with three to four inches of organic mulch so that they can properly thrive in your soil. The best types of organic mulch to use with blueberry plants include leaves, bark, and pine needles.

FERTILIZING

After planting, wait about a month before fertilizing highbush blueberry plants. Once that month is up, provide the plants with some fertilizer, the exact amount of which varies depending on the type you use. If you’re using 10-10-10 fertilizer, provide each plant with one and a half ounces of it. However, if you’re using ammonium sulfate, you only need to supply each plant with one ounce of it. Repeat this process once each year to keep your plants healthy.

REMOVING BLOSSOMS

To allow the highbush blueberry plant to establish its roots, don’t let the blossoms fully grow. In fact, you should remove these blossoms for the first two years. During year three, begin allowing a reserved amount of blossoming, and after that year, you can begin allowing full crops of blueberries to begin blossoming in your garden. Years of preparation can provide your garden with years of blueberries with the right amount of patience and effort.

If you don’t know how to care for highbush blueberry plants, then growing them for yourself is going to be quite difficult. However, if you stick to these guidelines and care for your plants all year round, it’ll be immensely satisfying when they finally produce those delicious blueberries. At the Gentlemen’s Backyard, we can supply you with highbush blueberry plants as well as a colorful collection of perennial shrubs to spruce up your garden this year and—with the right amount of care—many years after.

Read more

How to Care for Your Flower Garden

Flowers should be a warm and welcoming addition to any yard. However, to make sure they stay beautiful instead of becoming an eyesore, there are some key tasks you’ll have to carry out from time to time. These guidelines will show you how to care for your flower garden so you can sustain a beautiful, blooming display for all to see.

WATER CAREFULLY

Giving your plants the right amount of water is vital to their growth, and that really does mean the right amount of water. Different species of flowers require different watering techniques. Once you buy flowers, make sure you know how often to water each different flower variety.

Typically, flowers require about 1 inch of water each week. When planning your watering schedule, you have to take into account local climate factors such as how often you receive rainfall. Factoring that into your schedule will help you avoid overwatering your flowers and causing diseases.

One of the biggest hazards you’ll have to avoid when watering your garden is promoting diseases. Providing too much water can lead to fungal diseases that will infect your flowers, hindering their health and beauty. The best way to avoid this is by watering directly through the soil, so the water reaches the roots. This way, you’re not watering directly onto the foliage, avoiding moisture that can lead to the aforementioned diseases.

However, when watering this way, make sure you’re not overwatering your roots either. Diseases love water just as much as your plants do, so it’s important to limit how much water you provide your specific flower. Too much water can drown your roots, making them devoid of the air they need to breathe. This overwatering will promote sick, rotting roots in your garden. Suffice it to say, rotting roots is something you’ll want to avoid at all times.

PROVIDE THE RIGHT SOIL

Just like flowers need the right watering methods to thrive, they need the right soil conditions as well. Flowers typically require well-drained soil that is rich in organic material. However, always make sure to research the soil conditions that the specific flowers you buy require.

Organic Matter

Flowers need a variety of nutrients to properly grow, including calcium, magnesium, nitrogen, phosphorus, and potassium. By mixing organic matter into the soil around your flowers, you can help them gain these nutrients so they can successfully grow and survive. There are different types of organic matter you can use in your soil such as compost, manure, or leaf mold. The pH levels of certain materials can vary, so be sure to take that into account when obtaining organic material. For newcomers to gardening, the idea of adding decomposing material to your flower garden might sound less nurturing and more destructive. However, that’s far from the truth.

The organic matter does much more than provide your plants with the nutrients they need. Adding this material also improves the watering process. Organic matter allows the soil to retain water for longer periods of time, allowing the plant to absorb as much water as it needs to thrive. Organic matter also improves soil drainage, especially if you’re dealing with heavy clay soil.

Additionally, mixing organic matter into your soil provides a nourishing ecosystem for certain organisms in the soil. The decomposition process that the organic matter goes through provides these organisms with the nutrients they need to survive, thus improving the plant’s health. Soil might just seem like a simple material that sits on the ground, but it’s actually a living, breathing ecosystem that needs proper nutrients to thrive, just like your plants do.

DEFEND FLOWERS FROM PESTS

As previously mentioned, there are some living organisms, including insects, that thrive in tandem with your flowers to create a fully functioning ecosystem. Bees and a variety of beetles can be a welcoming addition to any blooming flower garden. For instance, ground beetles will defend your garden from destructive pests like ants, aphids, caterpillars, and slugs. Unwanted pests can eat foliage and spread diseases throughout your flower garden.

As you can see, some bugs are beneficial to your garden, while others are not. That’s why you must take careful consideration when you spot signs of bugs chewing away at leaves. You have to find a product that will both kill the unwanted pests and leave the good garden bugs unharmed. There is a wide variety of sprays, traps, and powder you can use to kill these pests, but don’t be afraid to be picky when choosing a method, as you should always keep your garden’s safety in mind.

REMOVE WEEDS

Weeds growing around your flowers will turn your glorious garden into an eyesore. However, weeds can do more than hinder your garden’s visual appeal. Weeds need the same nutrients to grow as your plants do, so they’ll decrease the amount of sustenance your flowers receive over time. Weeds can also bring uninvited guests such as the pests you worked so hard to deter in the last part of the process. There are different methods of getting rid of these weeds, such as pulling them out of the soil by the root. Depending on the size of the weeds, you can do this by hand or with the help of a hoe and pick.

Additionally, you can use a weed killer as well. These sprays can effectively kill weeds, as the name suggests, but you have to be very careful when applying weed killer to your garden; if the spray gets onto your flowers, it can kill them as well. Once you get rid of the weeds, replace their spots in the soil with a few inches of mulch. This will help ensure no further growth occurs, which is a possibility if the weeds left seeds in your soil.

These are some of the most important factors to remember if you want to learn how to care for your flower garden. From the soil conditions to the watering methods, promoting the beautiful blooming of flowers in your garden takes a lot of focus, as well as a strong understanding of the plants and soil conditions you’re working with.

For beginners, it might seem like a lot to take in. However, once you begin gardening and really get into the swing of things, you’ll realize why people have carried on this outdoor activity for so many years. At The Gentleman’s Backyard, our online plant store for Canada residents will provide any garden with a bevy of beautiful, vibrant flowers.

Read more

Common Deer-Resistant Plants and Flowers

Growing a beautiful garden only for nearby wildlife to snack on it can be frustrating. Hey, if you love growing deer or rabbit buffets, we won’t judge, but not everyone is going for that. This guide will introduce you to some of the most common deer-resistant plants and flowers you can use to build a strong, beautiful garden.

PEONIES

To humans, peonies feature beautiful displays of petals flowing out from green foliage. Peony colors are also very eclectic, with some sporting bright pink petals and others showcasing dark shades of red or brown. However, deer don’t find them quite as appealing. The reason for this is peonies’ scent and flavor. The scent won’t harm the deer, but it will certainly cause them to back off.

DAFFODILS

Daffodils, or narcissi, are literally full of themselves thanks to the sturdy cups that reside within their collections of petals. Just like peonies, daffodils are truly beautiful in the eyes of humans thanks to their design and wide array of colors. Daffodil designs include but are not limited to a stunning collection of yellow petals surrounding an orange inner cup, white petals and yellow cups, or yellow coloring through and through.

Don’t mistake their beauty for safety, though, because they’re very harmful to deer. Since daffodils are so poisonous to deer, they’ll leave these flowers be whenever they scout your yard for a meal.

HAKONE GRASS

Hakone grass is a type of ornamental grass that provides your garden with flowing golden foliage. Some appear golden all over, but some can sport stylish stripes of green as well. Hakone grass doesn’t just act as a great accent to a home garden—it also won’t fall victim to any deer that pop by for a late-night snack. Unlike daffodils, hakone grass won’t harm the deer—they just don’t like it.

FERNS

Ferns are types of plant that, similar to hakone grass, provide your garden with a simple, stylish texture. Plus, just like the other plants on this list, most ferns won’t fall victim to hungry deer. Whether you want a bold green polystichum or a white or purple athyrium, you can plant it without worrying about deer chewing it up.

Now that you’re up to speed on these common deer-resistant plants and flowers, you’re ready to start planting them in your yard. If these choices don’t stand out to you, a large collection of other deer-resistant plants is available at The Gentlemen’s Backyard, such as false goat’s beard and black-eyed Susans.

Read more